All further build updates and photos will be posted in my NicoClub build thread found here: NicoClub's Rally Car
Make sure and check it out, and join Nico, or email me if you'd like to comment, and join in.
Monday, March 8, 2010
Tuesday, November 17, 2009
Tally Ho
Well, after talking to a few cage builders, I think I have settled. As long as the world keeps spinning the same direction, I should be dropping the car off at Davenport Racing within the next couple of weeks. Doug is a cool guy, and he is one of the few local rally guys. Most of my other options would have required trailering the car a long distance to have it caged. This way the car will be local, and I might even be able to check out the progress. I have a lot of work to do before then, but I think I can get it done.
Some of you may wonder why I dont build the cage myself, there are reasons. Rally America cages must be built to FIA spec, and the regulations are very strict. Also, the cage will be very closely scrutinized when I go to apply for a log book. They will closely inspect all the welds, bends, gussets, and mounting points. Without a pipe bender, and prodigious welding skill. Building an adaquit cage is currently out of the question. Its also something I plan to remedy.
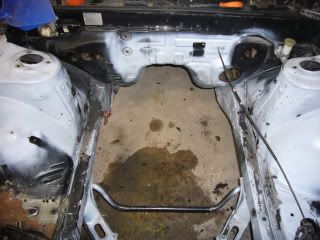
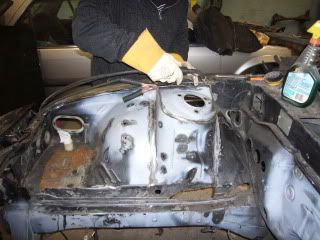
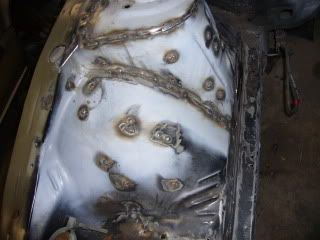
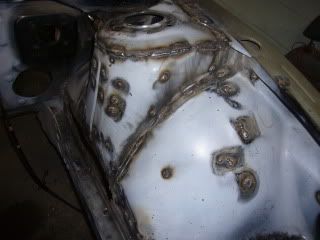
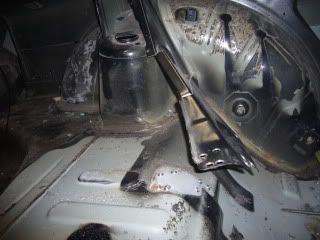
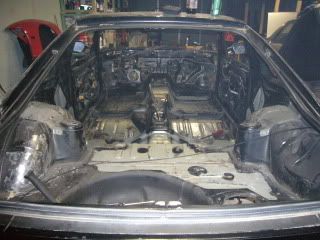
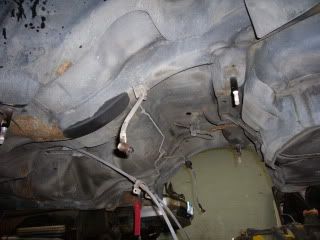
On to the updates. I left off last time with the car essentially fully disassembled. Now Im moving on to some of the tougher work. In some of the previous pictures, some of you may have noticed the rust in the typical spots for an S13, where the fenderwell/strut tower meet the frame. I chose this as the plase to start my assault on the rust.
You can sort of see it in this picture. The thin fender well has almost completely separated from the rails, on both sides.
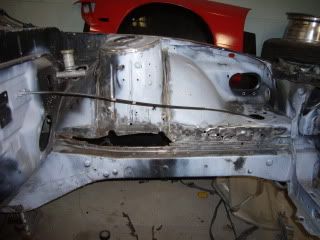
After attacking it with an angle grinder, and cutoff tool, I got to see just how far the rust had gone. Boy thats a big hole.
I also wire wheeled all the seems that will get stitch welded. Man the seam sealer they use is nasty.
The other side is almost as bad.
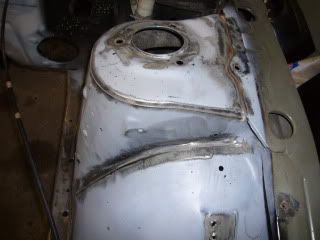
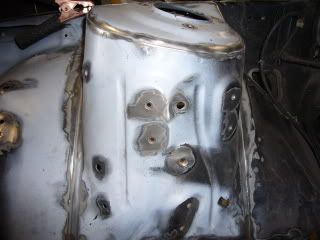
Besides the hole I cut, there is also a ton of holes in the fenders from the factory. Many are just filled with plastic plugs. Others were used for mounting power steering lines and other such rubbish. I will be changing that.
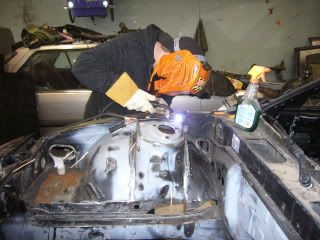
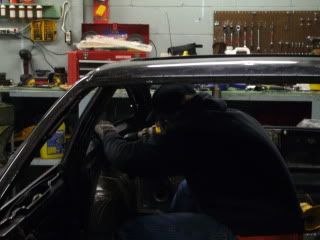
Gage getting ready to start stitch welding.
And hes off.
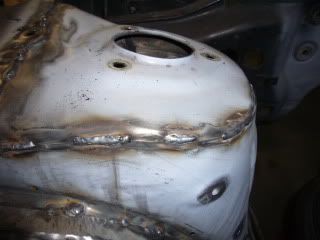
Not as pretty as some, but it'll do. The seam sealer was wreaking havoc on the way the weld was flowing.
With the stitching done, Gage took off, and I went to town on all the holes.
Sealed up tight.

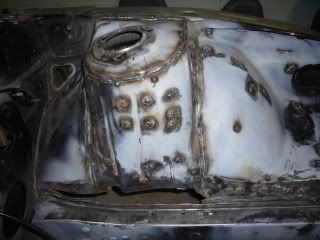
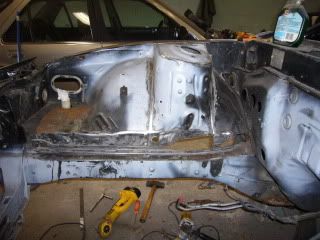
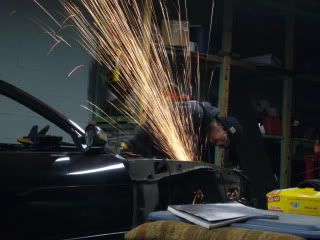
With the holes filled, I started grinding them down. It didnt take long to figure out I need ear protection. Man that thing makes noise. I was at it just long enough for Cale to snap this picture.
I will be back at it tomorrow afternoon. Hopefully I can get the plates welded on the bigger holes.
Some of you may wonder why I dont build the cage myself, there are reasons. Rally America cages must be built to FIA spec, and the regulations are very strict. Also, the cage will be very closely scrutinized when I go to apply for a log book. They will closely inspect all the welds, bends, gussets, and mounting points. Without a pipe bender, and prodigious welding skill. Building an adaquit cage is currently out of the question. Its also something I plan to remedy.
On to the updates. I left off last time with the car essentially fully disassembled. Now Im moving on to some of the tougher work. In some of the previous pictures, some of you may have noticed the rust in the typical spots for an S13, where the fenderwell/strut tower meet the frame. I chose this as the plase to start my assault on the rust.
You can sort of see it in this picture. The thin fender well has almost completely separated from the rails, on both sides.
After attacking it with an angle grinder, and cutoff tool, I got to see just how far the rust had gone. Boy thats a big hole.
I also wire wheeled all the seems that will get stitch welded. Man the seam sealer they use is nasty.
The other side is almost as bad.
Besides the hole I cut, there is also a ton of holes in the fenders from the factory. Many are just filled with plastic plugs. Others were used for mounting power steering lines and other such rubbish. I will be changing that.
Gage getting ready to start stitch welding.
And hes off.
Not as pretty as some, but it'll do. The seam sealer was wreaking havoc on the way the weld was flowing.
With the stitching done, Gage took off, and I went to town on all the holes.
Sealed up tight.
With the holes filled, I started grinding them down. It didnt take long to figure out I need ear protection. Man that thing makes noise. I was at it just long enough for Cale to snap this picture.
I will be back at it tomorrow afternoon. Hopefully I can get the plates welded on the bigger holes.
Wednesday, November 11, 2009
Seat mounts and suspension.
Man, I have been slacking on the updates. Good news though, the first wave of suspension bits have been ordered!! Im going to blaze some trails for myself personally with this setup, and Im sure it will get lots of comments. Look for pictures, maybe even a breakoff thread in the next few days.
On to the update.
I left off last time with one of the rear seat mounts mostly removed. I finished that one up, and got the other one ripped out.
All gone. You wouldnt thing these things weighed much, but when you put them together, and add them to the long list of other stuff, it turns out to be quite a bit.
Opens things up nicely.
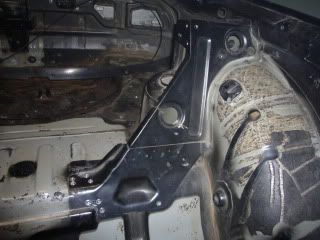
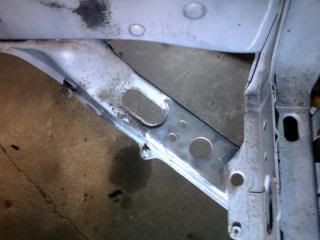
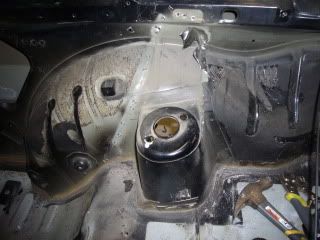
With that finished up, I shifted gears, and moved to the engine bay. Looking at the pictures, some of you may have noticed I left the front sway bar and tension rod brace in the car. There was a reason.
Most of you have heard of or seen the Nismo and Jonnie Fraz tension rod braces. Well, those cost money, and a lot of it. It will be much cheaper to make my own, but even more importantly I can build it to my own specs.
The factory tension rod brackets are two separate pieces, bracing them together will help shore up the front end. The only problem is, I need to clean and prep it properly before building. Not to mention I have more important things to work on. The brace is something I can work on while the chassis is away for caging.
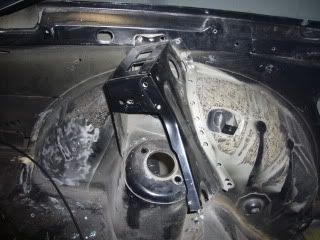
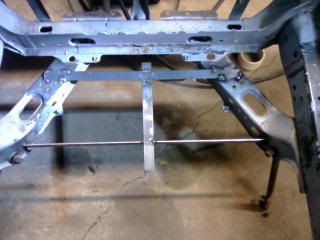
To keep the shape, and lock the pieces together I grabbed a couple pieces of steel, and went to town with the welder.
First I cleaned off the area, so I could get a good tack.

It doesnt look like much, but it keeps them together.
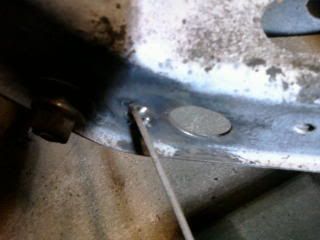
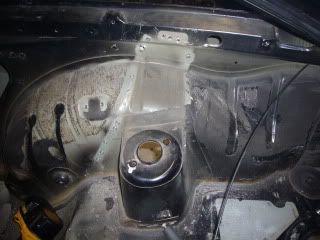
Then I pulled it out of the car. It will go on the shelf to be addressed later.
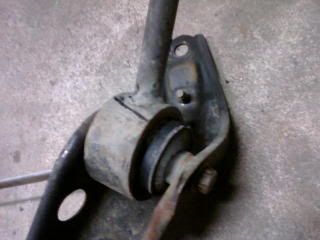
I wonder if it needs bushings?
That about raps it up for what I accomplished that day.
On to the update.
I left off last time with one of the rear seat mounts mostly removed. I finished that one up, and got the other one ripped out.
All gone. You wouldnt thing these things weighed much, but when you put them together, and add them to the long list of other stuff, it turns out to be quite a bit.
Opens things up nicely.
With that finished up, I shifted gears, and moved to the engine bay. Looking at the pictures, some of you may have noticed I left the front sway bar and tension rod brace in the car. There was a reason.
Most of you have heard of or seen the Nismo and Jonnie Fraz tension rod braces. Well, those cost money, and a lot of it. It will be much cheaper to make my own, but even more importantly I can build it to my own specs.
The factory tension rod brackets are two separate pieces, bracing them together will help shore up the front end. The only problem is, I need to clean and prep it properly before building. Not to mention I have more important things to work on. The brace is something I can work on while the chassis is away for caging.
To keep the shape, and lock the pieces together I grabbed a couple pieces of steel, and went to town with the welder.
First I cleaned off the area, so I could get a good tack.
It doesnt look like much, but it keeps them together.
Then I pulled it out of the car. It will go on the shelf to be addressed later.
I wonder if it needs bushings?
That about raps it up for what I accomplished that day.
Wednesday, November 4, 2009
Cutting spot welds.
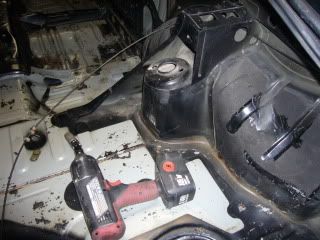
I only had a little while to work, so I cleaned up a little, then I started working on the rear seat mounts.
They are dead weight, and any structural value they may have had, will be replaced by the cage.
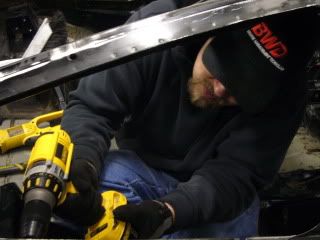
MMM spot weld cutter.
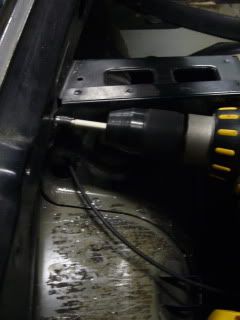
There is just a tiny bit left, but the battery for the drill died, so I called it a night, but you get the idea.
They are dead weight, and any structural value they may have had, will be replaced by the cage.
MMM spot weld cutter.
There is just a tiny bit left, but the battery for the drill died, so I called it a night, but you get the idea.
Tuesday, November 3, 2009
Lightening in the palm of my hand.
The next day I took delivery of some parts I nabbed from a local 240 guy.
SR20 5 speed trans, SR radiator, heater core, with box, and a set of really ugly wheels, one of which is wrecked. Before you ask, the wheels are just for spares, and I got all of it for $250.
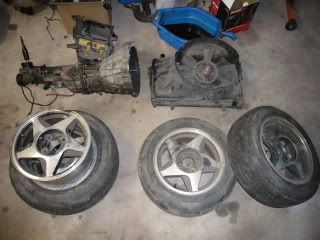
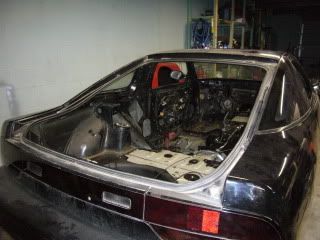
After snapping the picture of the parts, my camera died. I spent the rest of the evening removing glass. The only windows left in the car are the door windows.
I started the next day by making a rather large purchase. Some of you may have noticed that some areas of the car do have rust, and that stuff isn't going to fix itself. Its time to get serious.
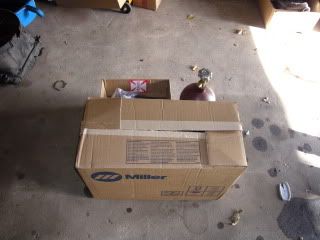
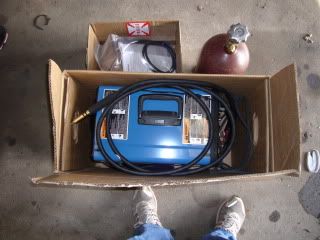
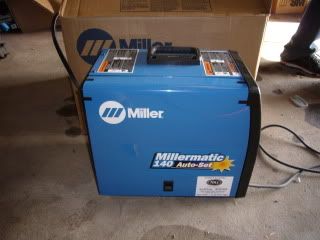
I broke down, and bought a welder. Its a millermatic 140. This is nothing industrial, but its a very high quality single phase wire feed. Its versitale, easy to use, and semi portable.
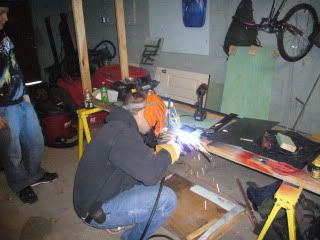
I wasted no time laying some beads. Ive never welded before, so it took a little getting used to.
I played on a pipe, and got used to the gun in my hands.

Then I grabbed some 1/8" steel plates, and began welding them together in Ts.

Luckilly I had Gage (professional welder) there to help me practice the basics.
As entertaining as sticking metal together with lightning is, I got bored.
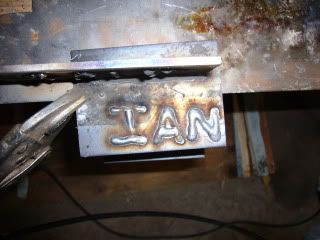
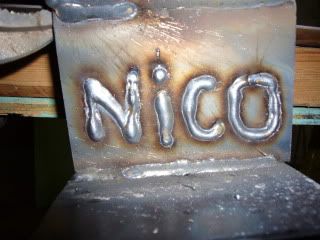
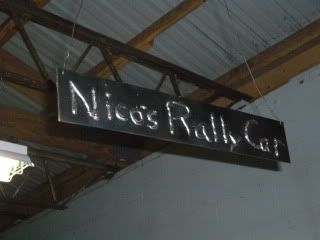
Then a genius idea hit me. Its time to truly christen this project.
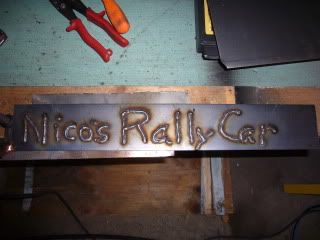
I drilled 2 holes in it, and hung it above my parking space.
And I will finish with that.
SR20 5 speed trans, SR radiator, heater core, with box, and a set of really ugly wheels, one of which is wrecked. Before you ask, the wheels are just for spares, and I got all of it for $250.
After snapping the picture of the parts, my camera died. I spent the rest of the evening removing glass. The only windows left in the car are the door windows.
I started the next day by making a rather large purchase. Some of you may have noticed that some areas of the car do have rust, and that stuff isn't going to fix itself. Its time to get serious.
I broke down, and bought a welder. Its a millermatic 140. This is nothing industrial, but its a very high quality single phase wire feed. Its versitale, easy to use, and semi portable.
I wasted no time laying some beads. Ive never welded before, so it took a little getting used to.
I played on a pipe, and got used to the gun in my hands.
Then I grabbed some 1/8" steel plates, and began welding them together in Ts.
Luckilly I had Gage (professional welder) there to help me practice the basics.
As entertaining as sticking metal together with lightning is, I got bored.
Then a genius idea hit me. Its time to truly christen this project.
I drilled 2 holes in it, and hung it above my parking space.
And I will finish with that.
Sunday, November 1, 2009
Glass=bad
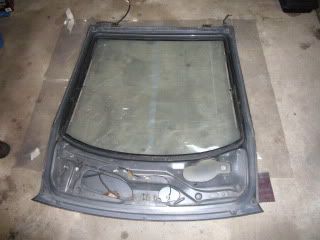
I pulled the rear hatch off. Man that thing is heavy.
I lade down some plastic, and then put the hatch on top of it.
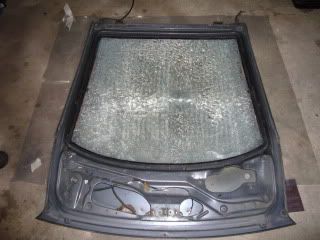
Then I whacked it with a blunt object.
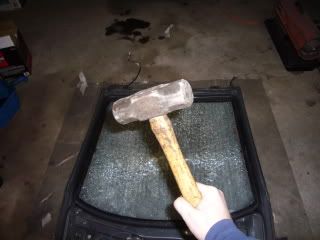
Huh, no thats not a hammer, its a poundometer, its a precision adjustment instrument.
Its not so heavy anymore. I wonder why I looked so grumpy.
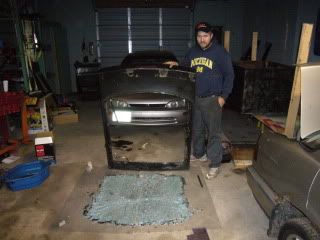
Im sure some of you will ask why I broke the glass. The reason is simple, I plan to run lexan in all the rear windows. Removing the hatch glass without breaking it, is nearly impossible, so I chose to break it on my own terms, thereby minimizing the mess.
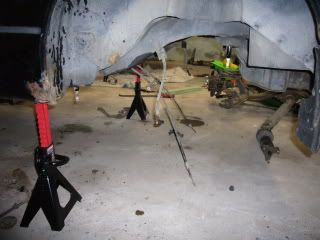
Moving on to the rear suspension
Out came the shocks.
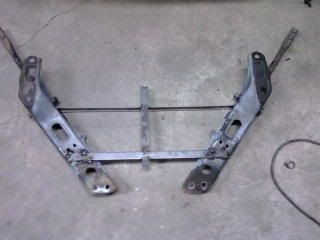
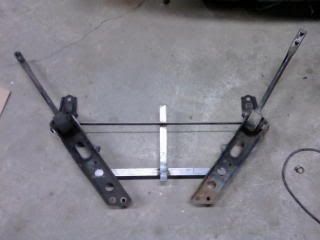
Man I got lazy with the picture taking. Suddenly the subframe is out.
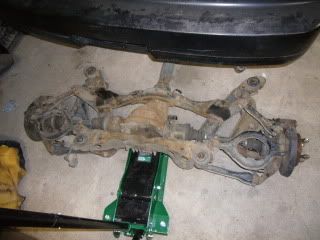
Man that rust looks bad in the pictures. In reality, its just surface nasty.
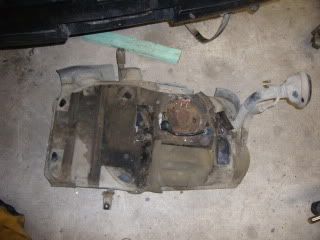
Ive never removed an S13 fuel tank, but its honestly the easiest tank I have ever dropped. Its dirty, but in good shape. I have not yet decided whether to run the stock tank or a fuel cell. Just another item on the TBD list.
That was all I accomplished that night.
I lade down some plastic, and then put the hatch on top of it.
Then I whacked it with a blunt object.
Huh, no thats not a hammer, its a poundometer, its a precision adjustment instrument.
Its not so heavy anymore. I wonder why I looked so grumpy.
Im sure some of you will ask why I broke the glass. The reason is simple, I plan to run lexan in all the rear windows. Removing the hatch glass without breaking it, is nearly impossible, so I chose to break it on my own terms, thereby minimizing the mess.
Moving on to the rear suspension
Out came the shocks.
Man I got lazy with the picture taking. Suddenly the subframe is out.
Man that rust looks bad in the pictures. In reality, its just surface nasty.
Ive never removed an S13 fuel tank, but its honestly the easiest tank I have ever dropped. Its dirty, but in good shape. I have not yet decided whether to run the stock tank or a fuel cell. Just another item on the TBD list.
That was all I accomplished that night.
Subscribe to:
Posts (Atom)

